Mockups are a great way to make your freebies and digital products shine. They not only help visitors understand what they’ll receive, but they also make your offer feel more tangible and credible.
The good news? With today’s advanced tools, you don’t need to hire a graphic designer or boot up Adobe InDesign to create mockups that look professional. Here are my favorite tools and techniques for creating mockups in minutes.
What is a mockup?
A mockup is a realistic visual representation of a design that helps potential customers or users visualize what they’re receiving. For instance, if you have an eBook or PDF guide, a mockup that shows it in hard cover format can help them understand the substantive nature of it at-a-glance, even though they’ll never actually hold it in their hands.
Instead of having a raw design floating in a digital space, a mockup puts it into a realistic setting that gives proper context, like pages sprawled out on a desk.
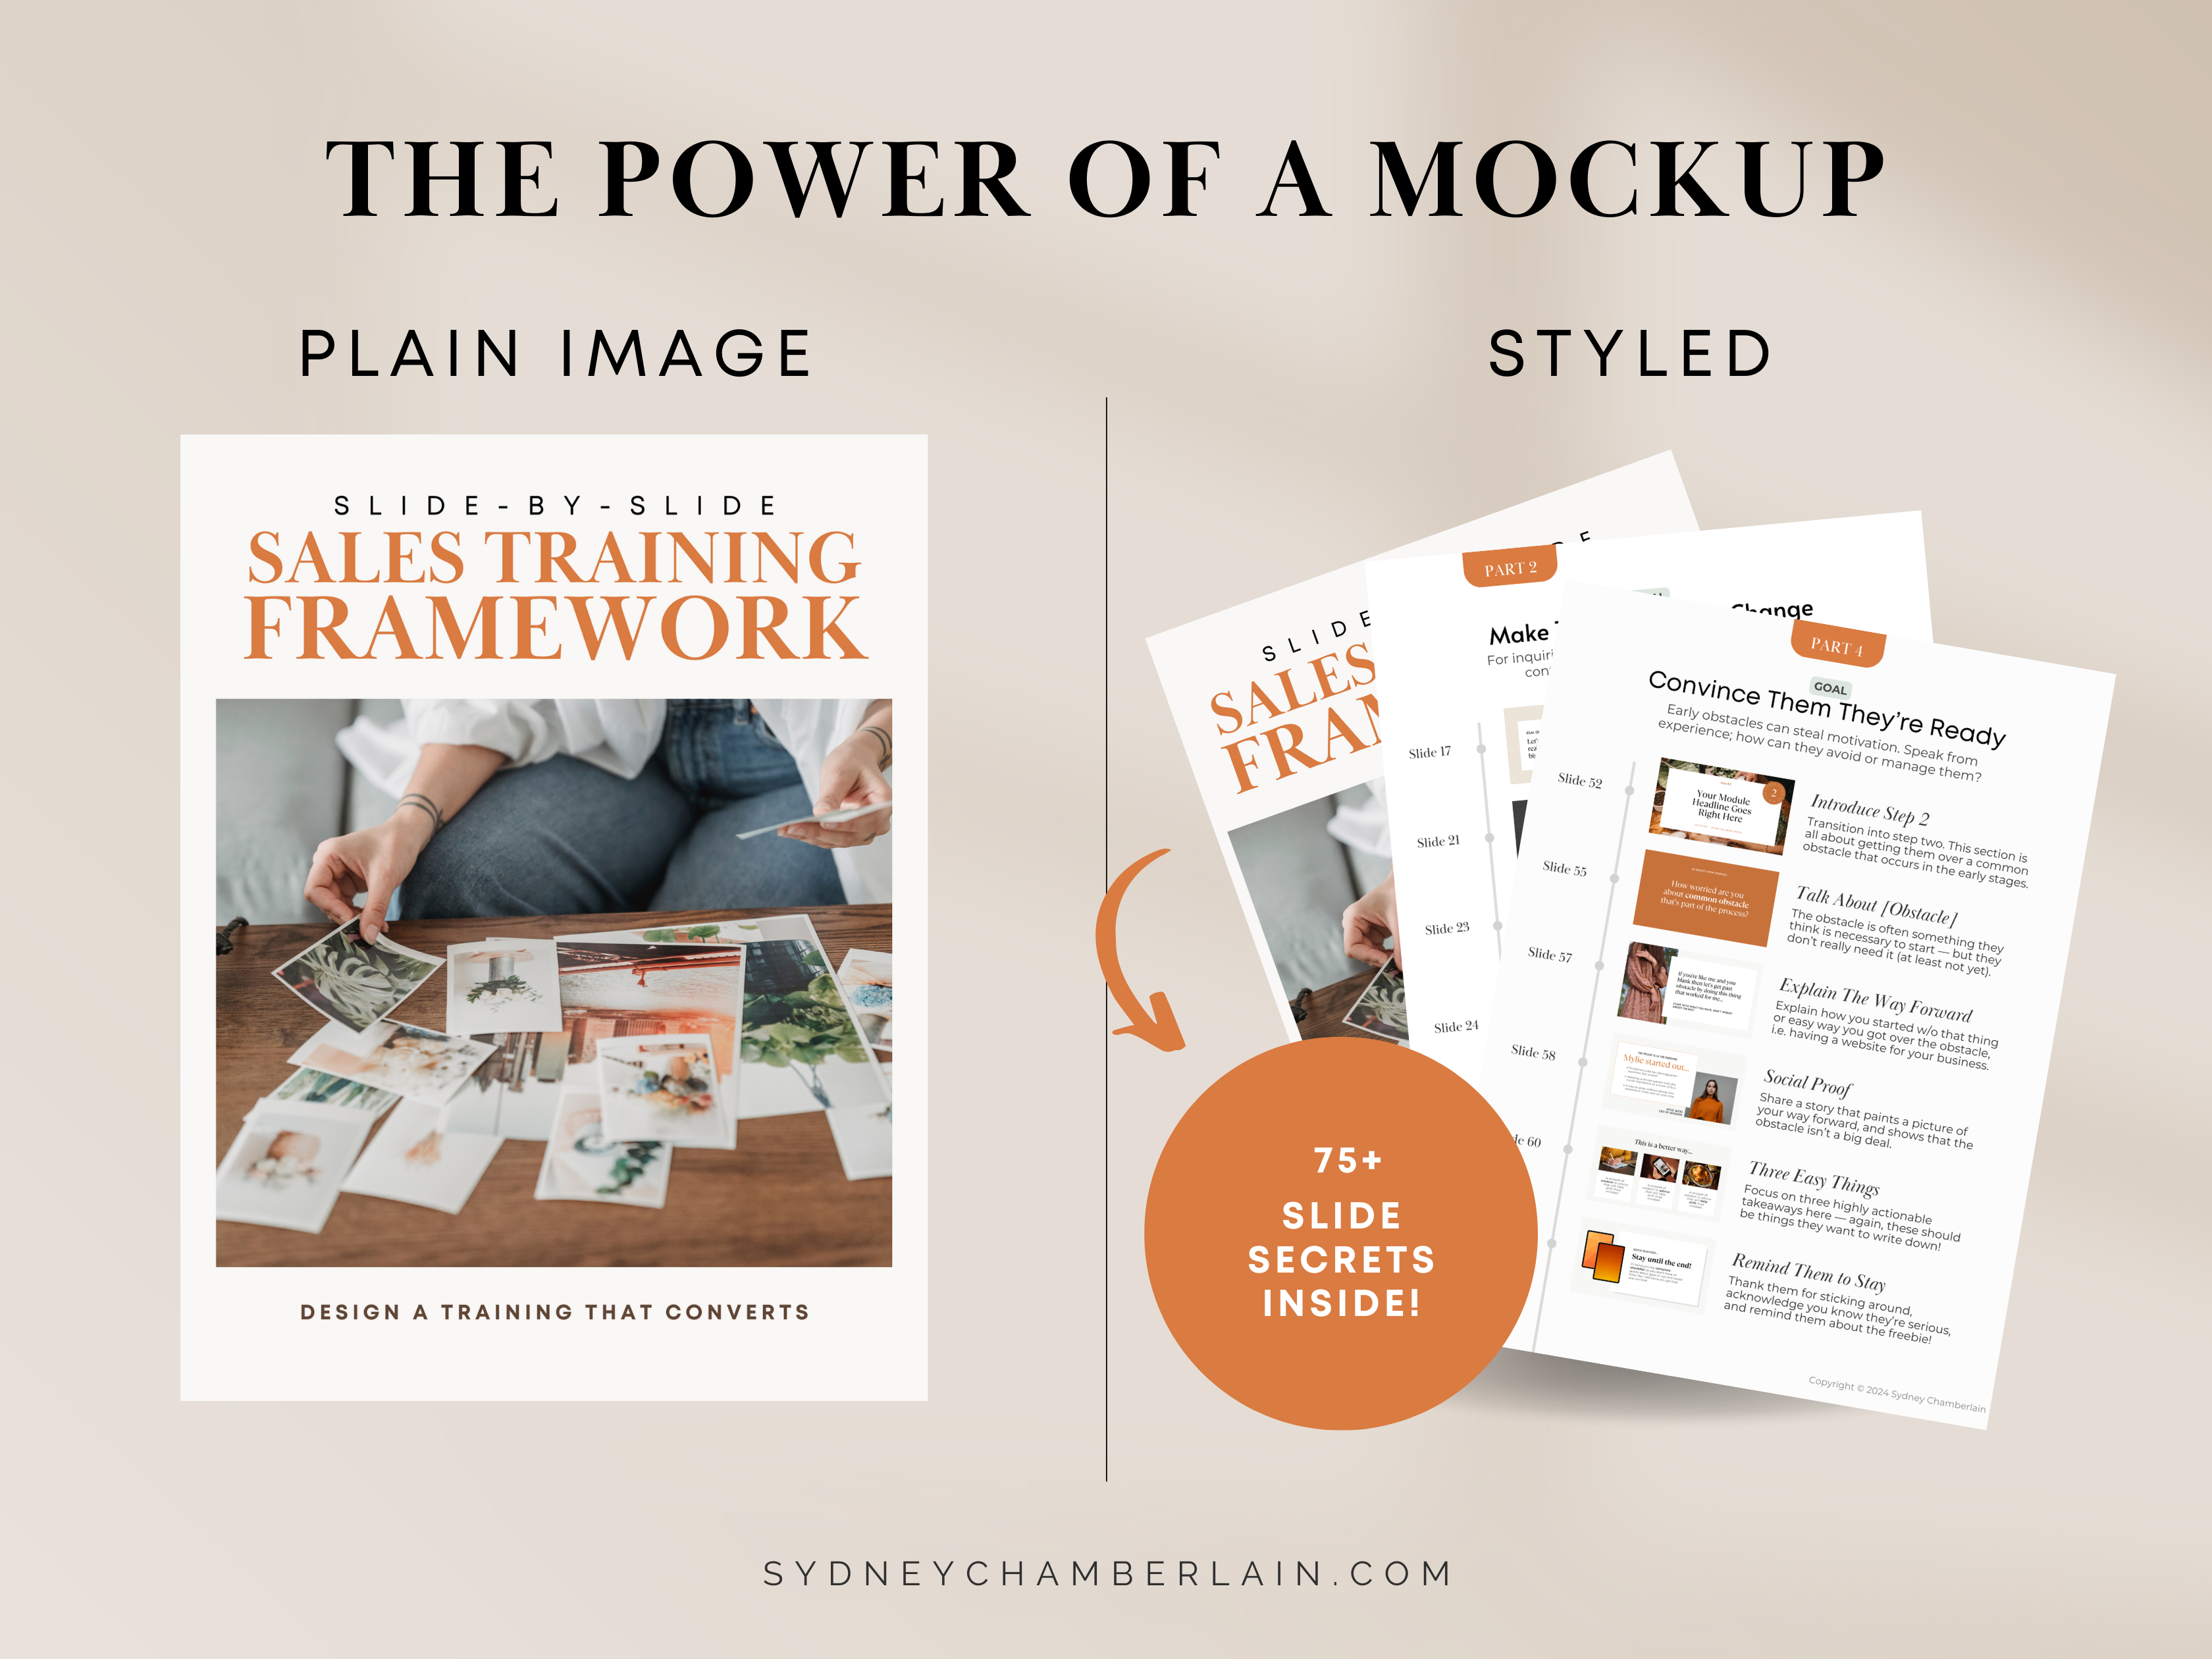
It’s not just about looking pretty (though that matters too!). Mockups help potential customers visualize what they’re getting, making your offers feel more legit and comprehensive.
When are mockups needed?
Showing beats telling in all aspects of sales, and first impressions are everything. When someone lands on your page, a slick mockup instantly shows what you have in store for them.
So, where should you share mockups? Just about everywhere:
- Landing pages and popups
- Social media posts and ads
- Email sequences and newsletters
- Digital storefronts
Mockups can transform a simple digital file into an irresistible, must-have product that stands out in the sea of offerings. Whether you’re selling an eBook, template, online course, or something else, don’t skip this step!
How to Design a Mockup
Designing a killer mockup isn’t so complicated these days — and it can totally transform how your digital offerings look and feel.
Whether or not you have graphic design experience, let me walk you through a few super user-friendly options for creating mockups that make people stop scrolling.
#1 Choose Your Format
Do you want your guide to look wire-bound like a workbook or as a glossy magazine? Do you want your eBook to look like a hardcover or paperback? Do you want your course to appear across multiple screens, showcasing its breadth and cross-device compatibility at the same time?
Whatever you’re trying to mockup, the first step is to figure out how you want to present it. If you’re selling a package — like a course, workbook, and coaching — you’ll probably need to create a handful of mockups for each element, then put them altogether into one image.
#2 Gather Your Images
Before you can make your PDF appear on the cover of a book or place your course onto device screens, you need to either design cover pages or take screenshots of your product in action.
It’s not uncommon to doctor these images, maybe making text bigger or editing out “noise” (like menus, logos, etc.) so that the finished mockups look cleaner and more aesthetic. But, make sure these images accurately represent the content or substance your users will receive.
If you have a fully designed product, like a PDF guide, all you need to do is download the cover page and a few inner pages as .jpg or .png files. For non-documents (courses, coaching, calculators, etc.), screenshots will do the trick.
#3 Pick Your Mockup Tool
Without clear and swift guidance on how to be successful, people can end up feeling uncertain, confused, remorseful, or frustrated with their purchase.
Creating a sequence tailored to new clients can improve adoption and success, which means more people raving about what they’ve purchased from you. Not only will this lead to happier customers who are more likely to purchase again, but it also boosts your odds of referrals.
- Canva: There is an endless library of free templates on Canva, some of which have simple frames that look like iPads and laptops, which you can place your screenshots or images on. But these designs are usually very limited since Canva isn’t a dedicated mockup tool.
- Shots: This powerful free tool allows you to upload screenshots or images and place them onto realistic devices or frames that can look like slides or pages. There are many customization options for placement, tilt, backgrounds, and shadows.
- Mockup World: You’ll find bags, t-shirts, devices, magazines, books, and products galore in this gigantic mockup template library, most of which are entirely free to use — but you may need paid software like Photoshop to open and use the mockup files.
#4 Finalize Your Design
The exact process you follow to create mockups will depend on the finished layout you’re envisioning, but let me briefly walk you through my workflow…
I usually start by opening the elements on my computer, just like a user would, and taking screenshots of the most comprehensive and/or aesthetic pages. The goal is to show how substantial the product is, so capturing covers, table of contents pages, and checklists — all of which look good at a smaller scale — is a good place to start.
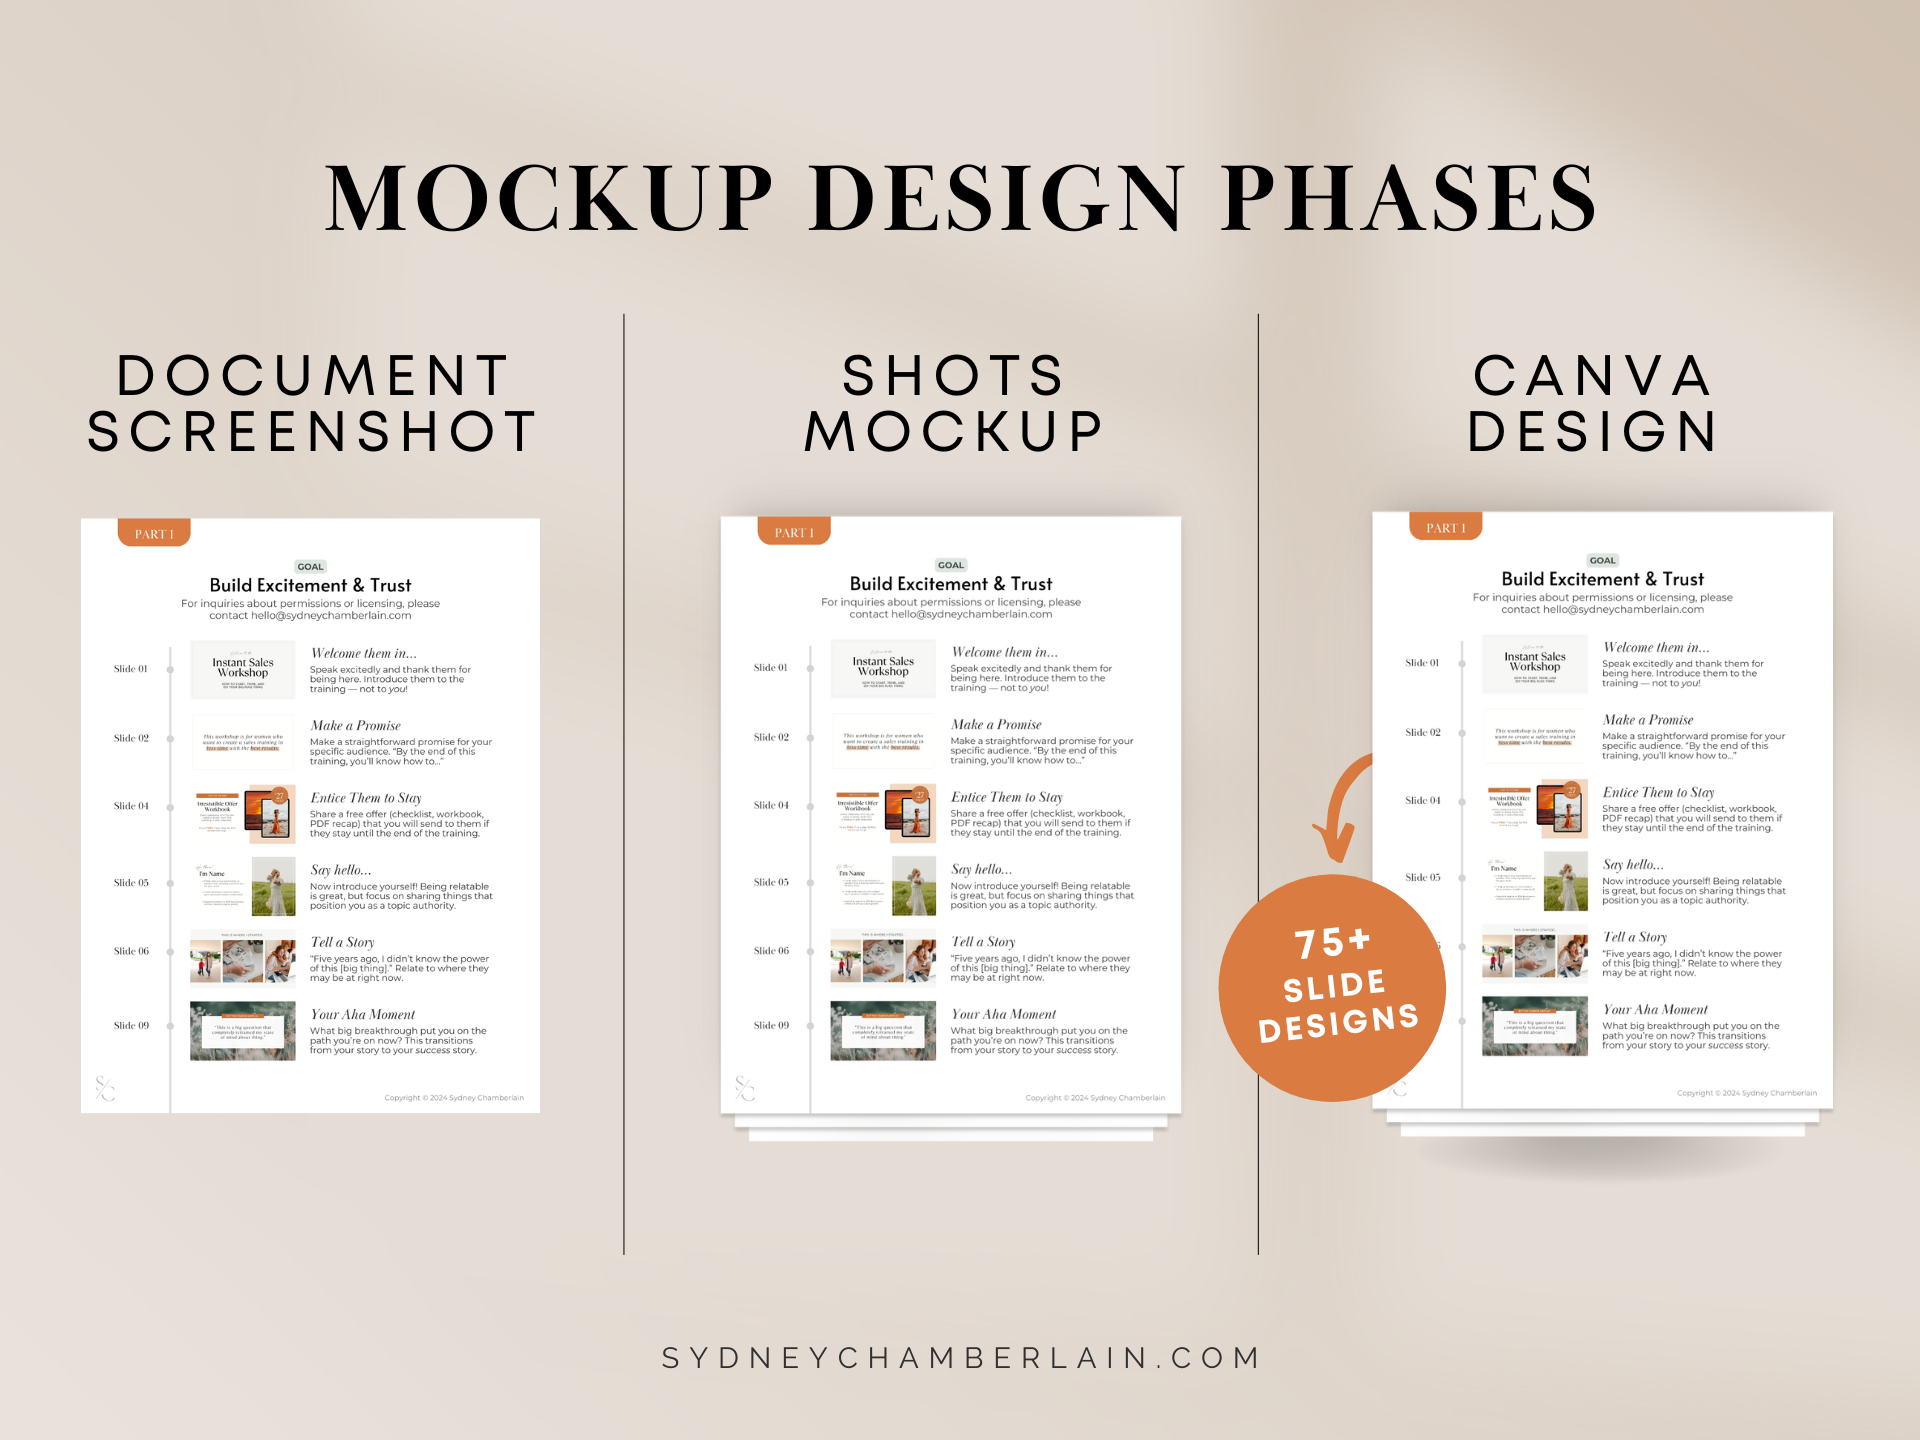
Once I have my screenshots or images, I almost always take them into Shots to create “pages” (complete with shadows) or put them onto a device screen, like an iPhone or iPad. I download each mockup without a background as a transparent PNG file.
Lastly, I upload my new mockups into Canva, where I place them into one cohesive “mega mockup” — which is essentially just a nice layout that puts all my mockups together. You can add next and highlights too to create the final design.
Examples of Mockups
Need some inspiration for your digital products? Here are my favorite examples of mockups at work.
Device Mockups by MasterClass
Book Mockup by Front Desk
Course Mockup by Elisabeth Stuckey
Best Practices
Your mockups should give people a taste of what to expect by (literally) laying all the components out on the table for them to take a peek. This means carefully designing your mockup to highlight specific aspects of your offer.
- Keep your designs on-brand: Match your mockup’s aesthetic to your target audience and brand. Use your website colors and fonts to keep things consistent.
- Take the time to do things right:Use high-resolution images and sensible layouts. If you need to, use a template pack to help you get a polished final result.
- Make your product the star: Avoid complicated backgrounds and visual clutter. Opt for a clean, simple mockup that highlights your product’s key features.
- Avoid tiny details: Lots of people browse (and shop) from their mobile phones; make sure your mockups make a lasting impression even on smaller screens.
- Split test your mockups: If you can, create at least two versions of each mockup and test them. Sometimes a small change can dramatically improve conversion rates.
What's Next?
Mockups are just the beginning of your digital product journey. If you want to take your offers from being “just another download” to a revenue-generating machine, you need a purpose-built funnel to drive sales and keep customers happy.
Check out the guides below to learn how to get the most out of every freebie and digital product you create.


